Friday, October 16, 2015

Diva Challenge #239 - "Munchin Play"


This week the Diva's Challenge is to use Munchin.  an official Zentangle® tangle.  The stepout can be found here, and on the Diva's blog there is a Sakura video showing Molly Hollibaugh drawing the basic version on a black tile.

 I started by going to my journal, and tried drawing it various ways. I tried following the instructions for transforming tangles out lined in Helen Williams' new book, Tangle Transformation. By the way, I am delighted with this book, and recommend it without reservation!


The last variation I tried stayed with the basic construction, but instead of having evenly spaced lines originating at the apex of the triangles, I varied the width between the lines, trying to make each resulting section smaller than the one before it.


I found this more interesting than regular divisions

I settled on the last option. I tried to follow a basic rule: That each line would divide the remaining available space in half. 


Munchin divided with 4 lines into 5 sections, with Flux in the largest section

The rule worked, but I found the large sections too roomy.  I tried adding a tangle inside the largest section of the triangle. That section was created with the first line (line 1 above) that bisected the baseline of the triangle.

I was ready to do a tile.


Munchin with graduated divisions in each triangle. Triangles filled with (spiraling clockwise from upper right) Celtic Triskele, Amaze, Flux, Shattuck, ????, Extracto, Tipple, Bunzo, Drip Drop, ????, Diva Dance Foxtrot, Tripoli, Zenplosion Folds, Mooka

That was OK, but I felt like I could do more. I thought I could divide the tile diagonally into a section filled with a smaller Munchins (still graduated sections) and a single large Munchin triangle  (lower left) with each section filled with another tangle. I even sneaked in a few awkward Paradoxes. Can you spot them? 


Munchin with Mooka, Flux, Snail Tangleation, Shattuck, and Tipple.

Still not happy, not sure why....So I returned to the sketchbook and looked at the versions of Munchin that I drew with curved lines.


Munchin with simple C-curve lines (H.W. refers to Helen Williams, "A Little Lime")
Better.


Munchin with S-Curve lines (mostly)
Still Better! Time to try another tile...


Munchin Monotangle with S-Curves

I don't know if I will ever really like Munchin. I wish I had more time to play with it. I reminds me a little of Aquafleur - beautiful as an object, but challenging to work into a design with other tangles.

Still, it was a good challenge and motivated me to study and to practice a single tangle and try some possibilities. As usual, critiques are welcome!


Thursday, October 1, 2015

Cooking Class #2, and a WIP

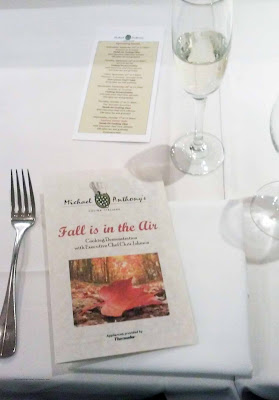
Wednesday was the second of the two cooking classes I signed up for at Michael Anthony's this trip..

Greeted with a glass of Prosecco, as usual.


Minestrone was the soup this time, and like the Italian Wedding Soup we did last time, was totally different from versions I've had before. Vegetarian (or Vegan, I can't keep them straight), with onions, butternut squash, zucchini, yellow squash, and Savoy cabbage

All the versions I've had before have included some type of pasta, which is not traditional in Italy, according to Chef Chris. Instead we used farro and Borlottis. Borlottis are dried beans, very similar to what we call Cranberry beans here, that are soaked over night and cooked til tender. They are perfect for this dish because even after cooking they retain bite and don't get mushy like other beans. Chris says the appeal of this dish is that it's not watery like a lot of Minestrones, but has what he calls "Guts." It was truly delicious, so much so that I forgot to take a picture in its pristine state, but plunged right in. Sorry!


Minestrone with"Guts"


The entree for this class was a traditional Chicken Cacciatore served on a bed of the best polenta I've ever tasted. The chicken was cooked perfectly, not dried out, not stringy, but tender and moist. If you've ever braised chicken, you know how difficult it is to get it perfect. 

This is one of the reasons I take these classes - I learn the "best" way to prepare things like polenta, risotto, chicken, etc. - straight from the Chef's mouth, so to speak. And Chef Chris is extraordinary. Many of the recipes he teaches are not on Michael Anthony's menu, but are recipes he learned from the Italian side of the family while growing up in New Jersey . 


Chicken Cacciatore with polenta


Finally we closed with a whole pear, poached in Cabernet wine and cinnamon. After the pear is cooked, it is removed from the pot and the wine reduced to a yummy, sweet-but-not-too-sweet, sauce that you can smell a mile away. In this case it was served with a scoop of vanilla Gelato. Very light dessert, which was good after the two dishes that preceded it.


Cabernet-poached Pear
There was no tangling on my menus during the breaks like last week. I was seated at a table with three delightful ladies who were attending for the first time and commanded my full attention! They apparently were not aware that they needed to pace themselves, both with the wine and the food, so all three were a little buzzed and stuffed by the end of the meal. They agreed that it was a lot of fun, and that they would do it again..

I have been doing a little Zentangle-Inspired-Art (ZIA), which I will share in another post after it's finished. Here's a WIP teaser, though:


Until next time (probably from home - sigh), Aloha.

Friday, September 25, 2015

When I'm not tangling...

If you've read my blog before, you'll know that one of my favorite things to do while on Hilton Head is to take one or more of the cooking classes at Michael Anthony's Cucina Italiana. I've been doing this for several years now, and it has completely changed how I cook. Last April I took two of them and reported on it in this blog entry, and in this one.

There are two types of classes - Hands-on and Demo. The Hands-on classes are my favorite, since you get to prepare each dish yourself (sometimes with a partner).  But they also take longer - up to 4 hours if you get lucky in your partner! Plus, you don't sit down for the lunch you've prepared until everything is done. That means a late, heavy lunch, which puts a damper on dinner plans.

The Demo classes, where Executive Chef Chris Johnson prepares the dishes while you watch and take notes, only takes 2 hours, and you taste the dishes as he finishes each one. Easier on the time, and you eat early enough that you can still enjoy dinner.. So I signed up for two of the Demo classes this time - the first was today. The handout has all the recipes that Chef Chris prepares in the class, and as you arrive you are given that, plus a nice glass of Prosecco.


Here is the layout and kitchen for the class. Get there early enough to get a seat where you can see every detail without resorting to the TV screen! I got there first, so I snagged the second seat from the right, where my nose was practically on the cutting board!


The kitchen

One of the things that slows down the Hands-on class is assembling the mise-en-place, all your ingredients, measured out before you begin and in some rough order of their use. For the Demo classes, this is all done ahead of time (it's good to be Chef).


The mise-en-place. Note the heavy Italian pounder in front, used for preparing the pork scallopine
.
 Lunch includes wine, red or white, Prosecco in the center. 


 The first dish was Italian Wedding Soup, which we were told is not Italian, but Italian-American. The inspiration for this soup is a dish from the Campania and Lazio regions of Italy called "marriage soup," which originally referred not to nuptials but to the "marriage" of meat and greens. Whatever its origin, this recipe is so-o-o much better than the insipid Italian Wedding Soups I've had in the past. I can hardly wait to make it at home!


 Italian Wedding Soup 
Second dish - Occhi di Lupo alla Sardignola. Occhi di Lupo means "Eye of the Wolf" and refers to the pasta which is traditionally used in this Sardinian dish. We used a similar pasta - a mezzi rigatoni. This light and really satisfying dish has pasta, mild Italian sausage, and arugula, served in a light Pomodoro sauce.


Mezzi Occhi di Lupo


Occhi di Lupo alla Sardignola

The final dish was Scallopine di Maiale con Balsamico (Pork scallopine in a balsamic reduction). In the recipe was a pepper that I had never heard of before, but will certainly use - peppadew. It actually from Africa, and has an intensely sweet taste, but with a kick at the end. Absolutely delicious. Served here with sauteed spinach (which was actually green)


Scallopine di Maiale con Balsamico

There was a little down time between courses, so to keep myself from guzzling wine, I tangled on the only piece of paper available. It might only have been lunch, but I still had to drive home. Fortunately, I am never without my Micron pens!


The second entry in Diva Challenge #236: Freeform Aquafleur, Curly Bracket Feather, Fescu, Mooka
Fern
Cadent, Poke Leaf, and Poke Roo
t
A good time was had by all, Especially me. I've signed up for another one next week!


Wednesday, September 23, 2015

Diva Challenge #236, or when to know you're finished

This week's Diva Challenge was to Tangle Something Unexpected. For me, it also turned into an unexpected challenge to stop tangling.

We are on vacation this week, on Hilton Head Island. We have a lot of friends here, almost all chefs and servers at fine restaurants. Some of them, like Chef Chaun Bescos, we've known for years. We've watched his progress from sous-chef at Alexander's Restaurant to Executive Chef at Redfish Hilton Head. Anyway, we have several restaurants that we try to visit a couple of times each while on the Island. Since we have our favorite server[s] at each, we have to juggle reservations so that we hit the restaurant on the nights they are working. Plus in the case of Redfish, we have to schedule for nights when both our favorite server Whitney, and Chaun are there.

So we have a calendar that I print off before leaving home where we can write in reservations - both planned and made. That's is what I chose to be my Something Unexpected.

First, I divided the areas on the calendar that we wouldn't need into Strings. Forgive the awful photography - light poor and most of the pictures taken with my Kindle...


September calendar page with reservations and strings

Then I started tangling.


'NZeppel, one of my "go-to" tangles


Kept tangling...


Opus in the center and Fife to the right
Kept tangling.


Enhanced Opus a la Eni Oken and added Lap and Crescent Moon
Kept tangling


How could I not use Mooka?

A reasonable person would have finished with a little Rick's Paradox in the remaining triangle, but I just couldn't stop adding stuff...

Rashell with auras, Msst, Zinger, Bronx Cheer, Ahh, Dragonair, Arukas. Oh, and of course Rick's Paradox

Somebody stop me before I hurt myself.

The final step, a little shading.


Whew. So, what do you think? Where should I have stopped?


Saturday, September 12, 2015

Serendipity

If you follow the Zentangle method, there are no mistakes.

Yeah, yeah, yeah, I say - as I pull out my forbidden eraser.

But more often than not, if I slog on without erasing mistakes, I'm happy with the results.

Yesterday I learned I found that the Zentangle principle of No Mistakes applies to other media. I was planning to do a sgrafitto design on a new ceramic piece during my weekly pottery class. I had sketched out a variation (tangleation, in Zentangle lingo) of 'NZepple.


'NZepplel Petal


'NZeppel Sketch on right

 I started by painting the stiff leather-hard plate with three coats of underglaze - three different colors, in fact. I thought if I carved carefully I could reveal some of the underlying color. Little did I know I would screw it up and end up with a new (to me) technique to play with.


Plate with three colors (in order on photo, leaf green on top) and preliminary carving

I was impatient to begin carving, and the class is only three hours long. So I didn't allow the three layers to dry completely like I normally would. In the course of carving, I accidentally smeared the surface with the heel of my carving hand. Sh**!!!!

Then I noticed that by smearing, I had revealed the yellow (middle) layer. I kept carving, thinking, "What would happen if I deliberately smeared the surface?"

So I did. I used my finger to remove one, or two layers, and was really pleased with the result. The "petals" took on new depth, and the background was much more interesting.  I think I can use this technique to add Zentangle shading to my pieces!


Closeup of design, showing shading on "petals." Original smear at lower left corner.


I could have done more, been more subtle with my finger, but the underglaze dried too quickly. Next time I'll allow for that. Anyway, here is the carved plate. Not fired yet, not glazed.


Carved and "smeared" plate before bisqueing.
I can't wait to try this out again!

Thursday, September 10, 2015

The long-awaited (NOT!) Mishima post

Mishima is a surface decorating technique for ceramics - kind of a reverse sgrafitto. You can see my post on sgrafitto here. For this technique, the design is incised (scratched) first, while the clay is leather-hard and before a thin underglaze is applied. The underglaze runs into the carved designs. After a little drying, you scrape off the excess clay using a metal rib or a razor blade. 


Darted vase at the leather-hard stage

I incised this one with a freehand version of Helen Williams' tangle, "Curly Bracket Feather." The stepout can be found here. Tangling on a curved object is a whole lot tougher than on a tile or in a journal, let me tell you!


Same vase, incised and painted with three coats of black underglaze


Closeup of the incised and painted design

After the underglaze has dried, the a metal rib is used to scrape away the excess. The underglaze that flowed into the design remains.


Partially scraped vase, with metal rib. Vase is stuffed with plastic so the inside doesn't dry faster than the outside.


Closeup

Here's the vase after scraping and firing (bisqueing) the first time.


Carved vase after bisqueing

I then painted the vase all over with thin coats of blue and yellow underglaze, and bisqued a second time. Then several coats of clear glaze was applied, and the vase put through the final firing.


The finished vase

Here are some more finished Mishima Tiles.


This last example is a Mishima tray (the distortion is from the photographic angle). The pattern was carved freehand, and is a variation of "Tumbleweed" by Helen Williams.


Tumbleweed Tray:  Little Loafers clay, black underglaze and clear glaze

I thought the Mishima technique  would be good for fine-lined Zentangle Art. I may end up doing that, or maybe if my sgrafitto technique improves, I will stick with that.

Aren't you glad you waited?


Thursday, September 3, 2015

On not caring, and Diva Challenges #232 and #233

 "…do not depend on the hope of results. …you may have to face the fact that your work will be apparently worthless and even achieve no result at all, if not perhaps results opposite to what you expect. As you get used to this idea, you start more and more to concentrate not on the results, but on the value, the rightness, the truth of the work itself." – Thomas Merton


This seems like a good place to remember why I’m tangling. I tell myself that I only care about the journey, that what I produce doesn’t matter..But then I share my work with my sister, (also a tangler and an artist), and when she compliments what I’ve done, I start criticizing it. So somewhere in a dark corner of my mind, I do care about what I produce.

I don’t want to be that way.

So I’m going to start doing at least one challenge a week (contrary to what I said here) and post it.


Last week on the Diva’s websiteHolly Atwater challenged us to do one or more Zentangle meditations, or do a tile using Betweed. I love, love love the meditations, and hope Holly produces more of them. I only did #1 and #2, then went on to do a Betweed tile. 

Here are last week’s Challenge results:


Tripoli - Zentangle meditation #1 


Nipa - Zentangle Meditation #2


Betweed, with Rain, Bales tangleation, and Bilt


This weeks challenge (#233) was to use the latest official tangle, Zenith. This tangle was released at the recent Can Tangle. Stepout can be found here.


Zenith, with Tipple, Black Pearl, and Diva Dance


Saturday, July 18, 2015

Diva Challenge #226

Guest Blogger Katie Crommett's theme for the Diva's Weekly Challenge #226 was "simplicity."

 Fun - did this one with my Iced Venti No-Fat Latte at the Starbuck's in our local Super Kroger.


Rashell and O-Cee Tangleations

Sunday, July 5, 2015

Obsessed with Mandalas

I suppose, once I got into Zentangle, it was inevitable that my Inner Rational would take me by the hand and lead me to the ultimate in drawing symmetry - the Mandala.

I've always loved drafting. Back in my quiltmaking days, I was a huge fan of Jinny Beyer. I loved not only her fabrics and her innovative use of them, but that she could teach how to draft complex designs. At her Symposium on Hilton Head Island each year, at least on half day session would be a lesson on drafting, and these were the sessions I loved the best.

Even more, I loved getting a piece of Staedtler gridded vellum, a pencil, ruler, and compass (oh yeah, and an eraser) and drafting an eight-pointed star, a hexagon, a pentagon. Making the actual quilt square was anticlimactic. It was the drawing I loved.

So I've jumped feet first into the Mandala pool. I started thinking I would stick to black and white, Technically, this is a Zendala - a Mandala with tangles. I'll do another post talking about the process.


Zendala 001 - with Mooka and Onamato

I told people I wasn't interested in color, since the intricacy of the black and white drawings was enough for me. 


I lied.

Mandala 005 - Prismacolor pencils on Strathmore Mixed Media paper.